Posts

Showing posts from 2015

Monitoring Apache Storm using JConsole
Image
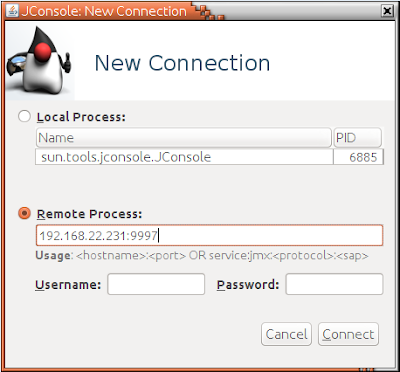
When you setup a storm cluster in a production environment it is important to monitor performance and resource usage of storm components to make sure that your cluster is working smoothly without issues. This post will guide you to enable JMX and monitor storm components using JConsole. Mainly there are two nodes to monitor in a storm cluster Nimbus Node Supervisor Node Configure Nimbus Node  Open storm.yaml file located at Nimbus_HOME>/conf/ directory and add below configurations. Here I will be enabling JMX at port 9997. You can specify a preferred port here. Add the host name of nimbus node nimbus.childopts: "-Xmx1024m -Dcom.sun.management.jxmremote -Dcom.sun.management.jmxremote.local.only=false -Dcom.sun.management.jmxremote.authenticate=false -Dcom.sun.management.jmxremote.ssl=false -Dcom.sun.management.jmxremote.port=9997 -Djava.rmi.server.hostname=192.168.22.231" Start storm nimbus using below command ./storm nimbus Configure Supervisor

Setting up Apache Storm Topology for CEP distributed mode deployment

Image
This post will guide you through the storm part of the configuration for the wso2 Complex Event Processor(CEP) deployment in distributed mode. Please refer: https://docs.wso2.com/display/CLUSTER44x/Clustering+CEP+4.0.0 for the CEP part of the configuration.      Here I will be illustrating a basic storm setup, with three instances running as below diagram. Their details are as below Nimbus host - 192.168.22.231 Zookeeper host -192.168.22.235 Supervisor host - 192.168.22.232 Configuring Zookeeper I will be referring the location of zookeeper folder  as <Zookeeper_HOME>. 1. Download  zookeeper  from here 2. Extract the zookeeper.zip file to 192.168.22.235 instance 3. Go to <Zookeeper_HOME> directory and create a folder called 'data'. 4. Zookeeper needs a configuration file to start. You can create a file called zoo.conf inside <Zookeeper_HOME>/conf directory tickTime=2000 dataDir= <Zookeeper_HOME> /zookeeper-3.3.6/data c